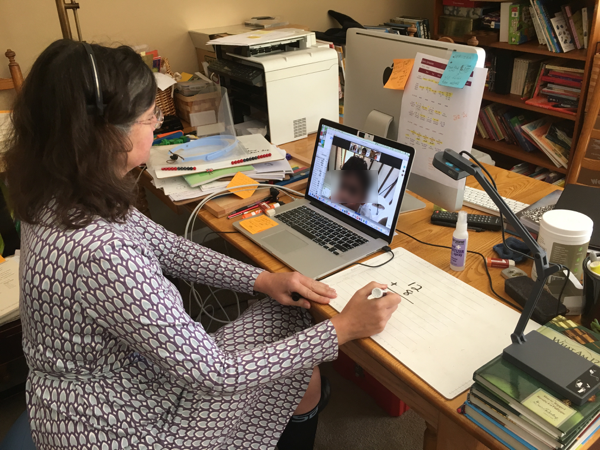
In education, 2020 is the year when Distance Learning became a household word. Every way (or modality) of delivering instruction, has distinctive characteristics that can be put to good or poor use. My wife, Anna Cencioso, teaches dyslexic students, and when Covid-19 hit, she was forced to stay at home, along with her students, and turn to distance learning. I helped her make the transition, and had the opportunity to watch her very engaging teaching style and techniques. Based on my experience in corporate learning and development, and hers in elementary school education, I wanted to share some tips for all the dedicated teachers out there who similarly had to pivot from classroom to distance education.
After trying a few options, Anna settled on Zoom video conferencing software and Google classrooms. After watching her struggle and then master the software, I added these extra tools for her:
Distance Learning Tools
Document Camera
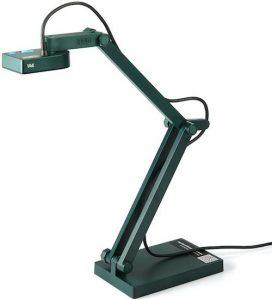
These cameras, like this IPEVO, plug into your computer and function just like an external web cam; except they have a base and pivot arm so you can put them on your desk and point them at a document or small whiteboard. With your video conferencing software you can select the camera and then show your document. With a small whiteboard, you can write or draw for your students in a faster and more natural way than using an online whiteboard.
Small Whiteboard
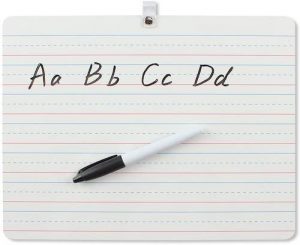
As noted above, these small whiteboards are kept next to your computer so you can easily write and draw for your students. Sometimes they are called lapboards.
Medium to Large Magnetic Whiteboard
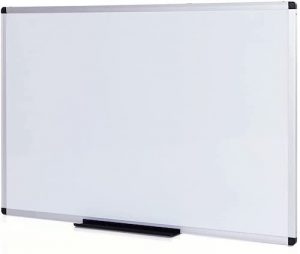
When you need more room than your small whiteboard provides, you can easily pivot your document camera to display the larger whiteboard. My wife keeps her large whiteboard behind her, mounted on our upright piano. The document camera comes with a very useful utility which allows her to adjust the exposure, zoom, and focus, so the whiteboard will be well-framed and easy to read. You can also place letters, numbers, tiles, or any other item with a magnetic base on the larger whiteboard.
Stylus

After mousing around all day, you will find a stylus to be more ergonomic and precise than a mouse or touch pad when using your software’s whiteboard feature.
Headset with Microphone
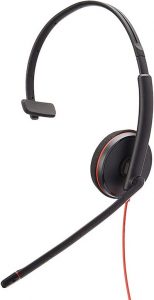
It is easy to discount the importance of this item, but please don’t. On your part, you will expend less energy focusing on what your students are saying if you have a headset on. For your students, your voice will be much clearer. Having a microphone near your mouth will also cut-down on the amount of distracting ambient noise from your environment. We feel a little claustrophobic with both ears covered, so we use a single-ear headset with one speaker that can be adjusted for either side. Require your students to use headsets, or earbuds, for the same reasons. Headsets with microphones in front of the mouth typically provide better audio pickup, but earbuds are better than just using the computer’s speaker and microphone.
Videoconferencing Teaching Strategies
Mute Students, No Custom Backgrounds
Keep the audio chatter and distractions to a minimum by muting your students. They can raise their hands if they would like to speak. If there is too much random chatter, the sensory overload is much quicker than if you were in a non-virtual space. The video conferencing audio is lower fidelity than real life, and auditory and visual overload will happen sooner. For the same reason, don’t allow students to use custom backgrounds. It is just another opportunity for them to pay attention to the wrong sensory stimulus.
Everyone on Camera
Don’t give students the impression that it is ok to drift in and out of camera. They need to be on camera at all times unless they have permission not to be. Do not allow them to just display their name, with no live image.
Multi-sensory Learning
Engaging multiple senses and motor movements often enhances learning. Try to find a way to let students manipulate figures, draw, etc. My wife found a program that she can share with students that allows them to draw on screen to specify a letter position.
Reduce Everything
As mentioned above in the headset topic, take into account visual and audio fatigue during video conferencing instruction. With that in mind, reduce everything compared to classroom instruction.
- Limit group sizes — fewer is almost always better — with 4 to 6 being ideal. We know this is not always possible!
- Limit periods of instruction to 30-50 minutes (Recommended: Grades K-2 — 30 minutes, Grades 3-5 — 45 minutes, Grades 6+ — 50 minutes
- Encourage your students to take breaks/walks
- Avoid large amounts of independent work unless at Grade 6 or above.
- Avoid speaking for more than 3-5 minutes without querying your students.
Share the Experience
Give students the opportunity to share their reaction to this new method of instruction. No matter how negative, find a way to validate their experience. This will open a way to help them understand what works best for them, and how they can focus on that. If others hear their struggles, they will all feel better about the experience by understanding that they are not alone, but can always do something to make it better.
Pair and Share
Utilize your video conferencing Breakout feature to form small groups of 2-4 students (Pair and Share.) You can visit the groups while they are active and provide further guidance, and then everyone can come back and debrief.
Parental Support
Younger children, or children with attention disorders will struggle with the executive functioning required to keep up with schedules. Try to engage parents to make sure children are tracking their videoconference invitations, and homework. Without parental support, you may find that your distance learning program will be less than 50% as effective as classroom instruction.
Put On a Show!
Let’s face it, the single greatest challenge with teaching using videoconferencing is holding attention and creating high engagement. Do what you can to mix things up:
- Use props like puppets, pets, mystery objects
- Use your hands to give the kids “something to watch”
- Modulate your voice, avoid a monotone
- Show and Tell can still work!
Conclusion
This article has focused on a “high-touch,” mostly real-time (synchronous) distance learning approach for dyslexic students who often have attention deficits. We realize many teachers will not be able to follow that approach to the same degree. Nonetheless, we hope this has been of some use for teachers struggling to make the transition. Thank you teachers!
Complimentary Articles
> PBS Education – Distance Learning Tips from One Teacher to Another